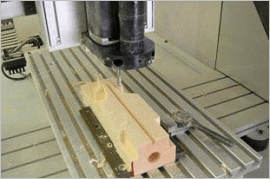
 For those of you who are new to MecSoft’s MILL Module plugins (or even if you just want brush up on your CAM skills) we have released a newly updated 140-page step-by-step tutorial on how to program 2-sided (also referred to as flip machining) toolpaths for the F1 CO2 Racer Body shown here.
This tutorial has been written for all of our PC-based CAM platforms (RhinoCAM shown), supports all 5 product configurations and includes the 3D CAD files as well as the completed CAM files! Here is a description of what you will find in this tutorial. A condensed Table of Contents is also provided below.
 |
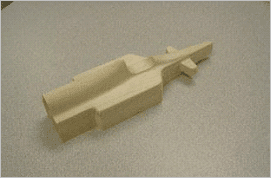 |
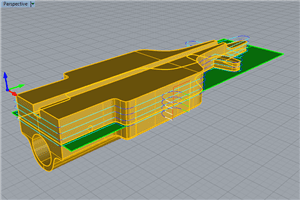
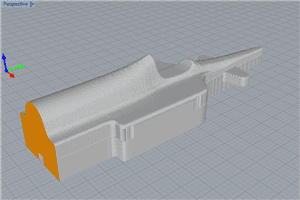
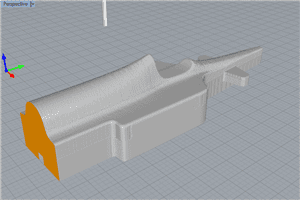
| The F1 CO2 Racer body machined from the Pitsco Custom Cruiser Blank SKU: W17823. | |
Bottom Side
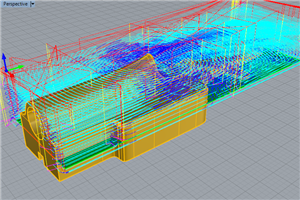
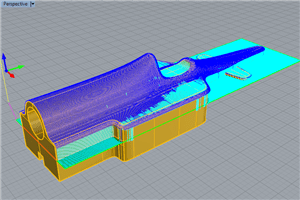
 The tutorial begins with machining the bottom side of the racer first. You will learn how to define the machine setup including part orientation, machine definition, post, stock, material and work zero definitions. It then goes into details on 3 Axis Horizontal Roughing using Clear Flats and Cut Level controls, 3 Axis Parallel Finishing and 2½ Axis Profiling with multiple cut levels, entry/exit and overlap controls.
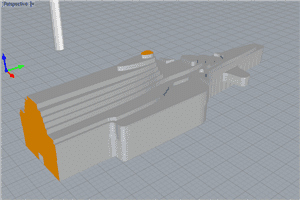
You will learn how to create cutting tools including Flat and a Corner Radius Mills. You will learn how to create Information and Setup Sheets as well cut material simulations. The toolpaths shown below are similar for all product configurations.
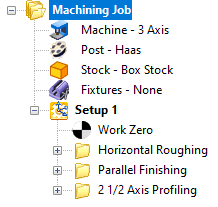
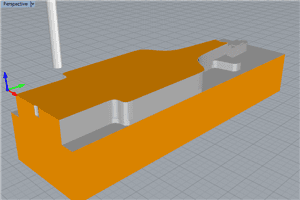
The Machining Job after completing the bottom side is shown here (similar for all configurations).
 |
 |
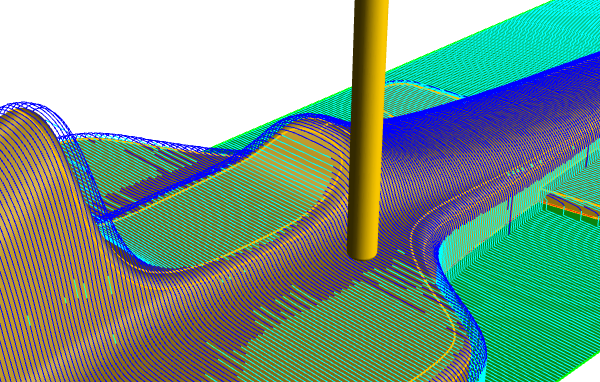
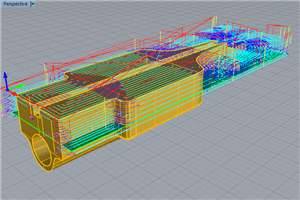
| 3 Axis Horizontal Roughing (BOTTOM) | |
 |
 |
| 3 Axis Parallel Finishing (BOTTOM) | |
 |
|
| 2½ Axis Profiling (BOTTOM) | |
Top Side
 The tutorial progresses to techniques for machining the top side based on each product configuration. Xpress users will learn how to save toolpath defaults. Standard configuration and higher users will learn how to save and load a knowledge base.
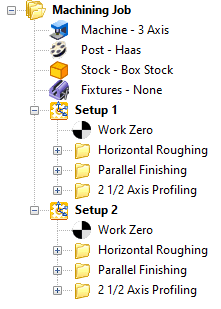
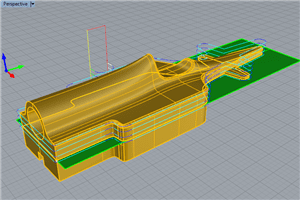
Professional configuration and higher users will learn how to create multiple setups for machining both the bottom and top sides in one Machining Job (shown here on the right). The cut material simulations are shown below using the Professional configuration.
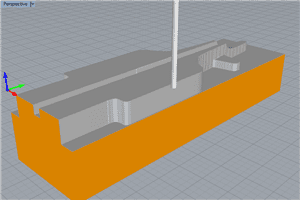
The Machining Job after completing the top side is shown here in the Professional (PRO) configuration.
 |
 |
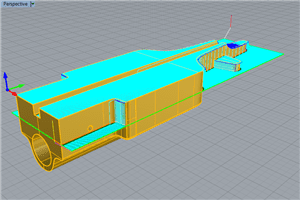
| 3 Axis Horizontal Roughing (TOP) | |
 |
 |
| 3 Axis Parallel Finishing (TOP) | |
 |
 |
| 2½ Axis Profiling (TOP) | |
Table of Contents:
Here is an abbreviated Table of Contents of this tutorial:
About this Guide
Getting Ready
To Machine the BOTTOM Side
Define the Machine & Setup (Part Orientation, Machine, Post, Stock, Material, Work Zero)
3 Axis Horizontal Roughing (Create a Tool, Parameters, View & Simulate)
3 Axis Parallel Finishing (Create another Tool, Parameters, View & Simulate)
2 Axis Profiling (Create another Tool, Parameters, View & Simulate)
Shop Floor Preparation (Information Sheet, Setup Sheet)
Posting G-Code
For Standard (STD) & Higher Configurations
Save your Knowledge Base
For Xpress (XPR) Configuration ONLY
Save your Defaults
To Machine the TOP Side
For Xpress (XPR) Configuration ONLY
Define the Machine & Setup (Machine, Post, Stock, Material, Work Zero)
3 Axis Horizontal Roughing
3 Axis Parallel Finishing
2 Axis Profiling
For Standard (STD) & Expert (EXP) Configurations
Define the Machine & Setup (Machine, Post, Stock, Material, Work Zero)
Load your Knowledge Base
Edit your Operations (Edit, View & Simulate)
For Professional (PRO) & Higher Configurations
Create a New Setup
Copy & Paste Operations (Edit, View & Simulate)
Shop Floor Preparation (Information Sheet, Setup Sheet)
Posting G-Code
Where to go for more Help
How to Download this Tutorial
 This tutorial is available as a FREE download to ALL MecSoft CAM users. To download this 140-page tutorial+source files, select from one of the links below for your MecSoft product:
More Information
For more information about each of these Mill Module products, including data sheets, videos and other resources we invite you to visit the following product pages:


