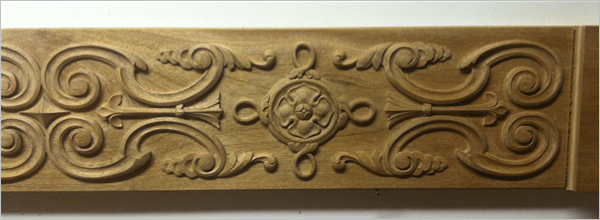
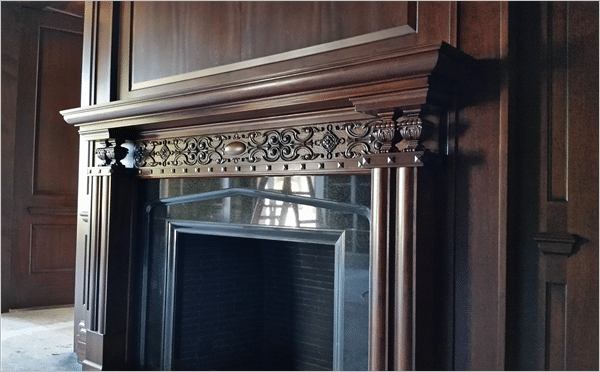
 This fireplace mantel project is a great example of how RhinoCAM CNC software has become one of Jim Lohmann’s (of Lohmann WoodCarving Company) goto software programs in his digital woodcarving workshop. Here RhinoCAM is used to machine complex 3D mesh models that Jim has sculpted in ZBrush. Jim designed the mantel shown below from a photograph that his client wanted the completed project to look similar to.
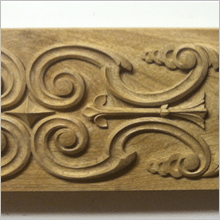
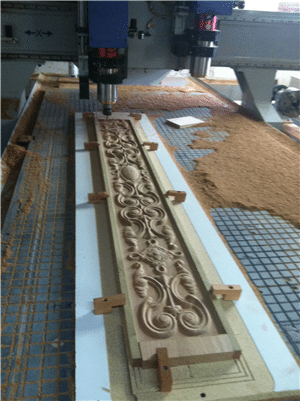
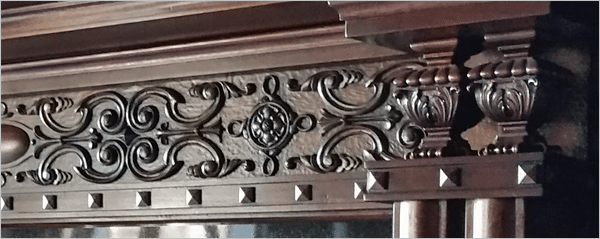
The mantle includes a 7” x 70” horizontal panel relief machined in Sapele, positioned across the top between 4 vertical columns, two on either end of the mantel. The upper decorative panel and the columns are both discussed in detail here. Be sure to check out the image of the completed fireplace mantel shown below!
This fireplace mantel project is a great example of how RhinoCAM CNC software has become one of Jim Lohmann’s (of Lohmann WoodCarving Company) goto software programs in his digital woodcarving workshop. Here RhinoCAM is used to machine complex 3D mesh models that Jim has sculpted in ZBrush. Jim designed the mantel shown below from a photograph that his client wanted the completed project to look similar to.
The mantle includes a 7” x 70” horizontal panel relief machined in Sapele, positioned across the top between 4 vertical columns, two on either end of the mantel. The upper decorative panel and the columns are both discussed in detail here. Be sure to check out the image of the completed fireplace mantel shown below! 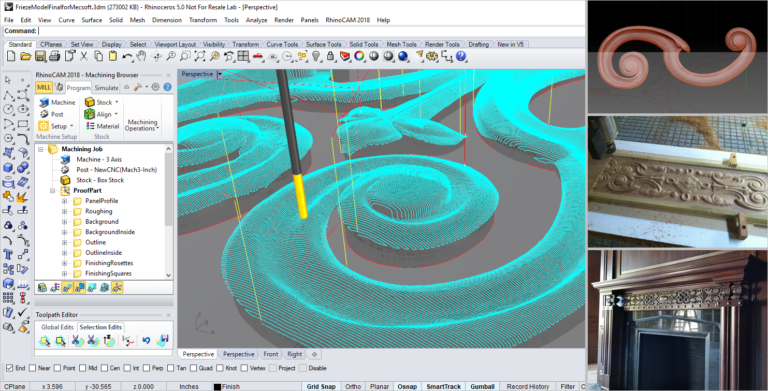
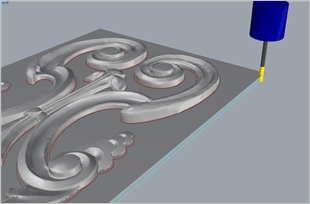
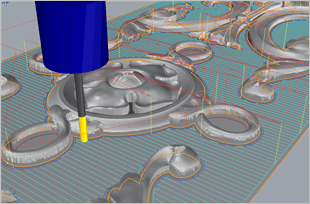
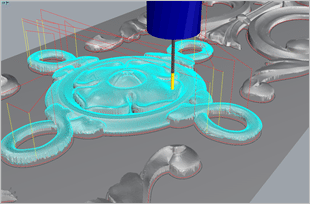
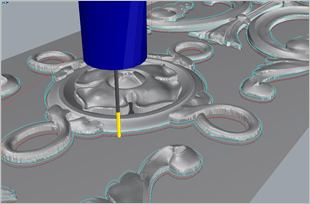
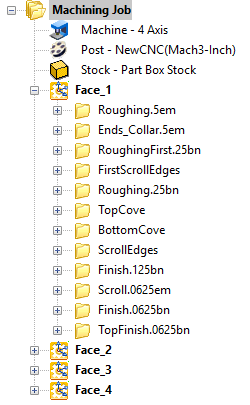
The toolpath strategies for the decorative panel are listed in the Machining Job on the right. The images of the RhinoCAM toolpaths are shown below.
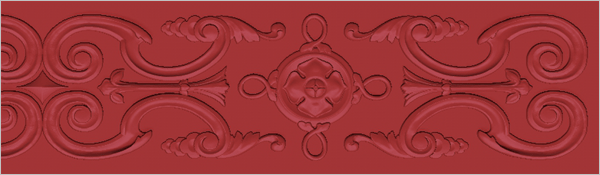
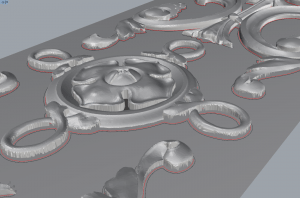
- Mesh Models – The mesh models are arranged on the panel and displayed on the XY plane in Rhino.
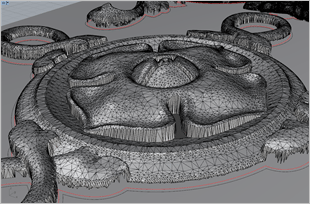
- Mesh Triangles – A close-up of the faceted mesh triangles in one of the two center rosettes.
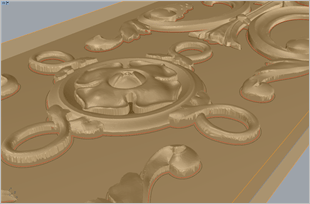
- Stock Model – The 7” x 70” x 1” stock model is shown displayed over the part model.
- Stock Perimeter – The Machining Job starts with a 2½ Axis Profiling strategy using a ⅛” flat end mill to cut the perimeter.
- 3 Axis Roughing – For roughing a 3 Axis Parallel Finishing strategy is used with a ¼” ball mill with a 25% stepover leaving 0.04” of stock remaining on the part.
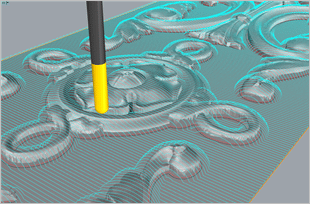
- Background Pocketing – For the background of the panel a 2½ Axis Pocketing strategy is used with a ⅛” flat end mill leaving 0.005” of stock remaining, linear cut pattern, mixed cut direction, a 75% stepover and a single cut level with a cleanup perimeter pass.
- Finishing Perimeters – Next are 2½ Axis Profiling strategies around the inner and outer perimeter of each mesh using a 1/16” ball mill and 3 cut levels of 0.063” each.
- Final Finishing – For the final finishing strategy is a 3 Axis Parallel Finishing strategy using a 1/16” ball mill leaving 0.015” of stock remaining, a mixed cut direction and stepover of 0.015”.
|
|
 |
|
|
 |
|
|
 |
|
|
 |
 |
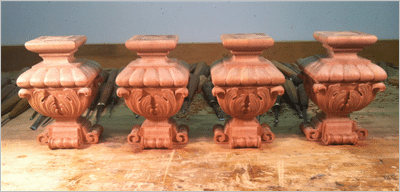
The 4 Axis Mantel Columns
 As we mentioned previously, the mantel design shown above includes 4 vertical column supports, two on each end. Each identical column is 4” square x 6” tall and are comprised of 4 identical sides to each column. Jim uses a positional (indexed) 4 Axis machining strategy to machine these columns taking advantage of the 4 Axis attachment capability on his NewCNC router.
In the Machining Job tree shown on the right, you see four setups named Face 1, Face 2, Face 3 and Face 4. The rotation axis is set to the Y Axis. Each setup has its own degree of rotation about the Y axis defined. RhinoCAM will post the axis rotation codes necessary to machine all 4 faces of the part. Each degree of rotation is listed below:
- Face 1: Y Rotation Axis set to 0 (zero)
- Face 2: Y Rotational Axis set to 90
- Face 3: Y Rotational Axis set to 180
- Face 4: Y Rotational Axis set to 270
In the Machining Job for Setup 1 you see a host of 2½ and 3 Axis machining strategies to both rough and finish that side while the rotation axis is fixed at zero degrees. Again, this is referred to as positional or indexed 4 Axis machining.

 |
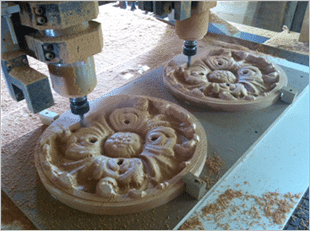 |
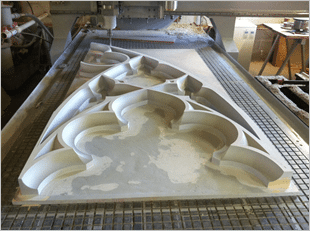
| More RhinoCAM projects from Lohmann Woodcarving (Left) Gothic window machining (Right) Gloucester Rosette dual head machining |
|
More About Lohmann Woodcarving
 Jim Lohmann has been practicing wood carving by hand for the past 45 years getting his start in the Boston area then moving to Chicago. Today Jim works from his shop in Covington Michigan where he has been practicing his craft for the past 30 years. For more information about Jim and Lohmann Woodcarving we invite you to visit him online at digitalwoodcarving.com and these additional links:


